When I was done with the incredible tour, I walked back outside to my car.
There in front of me was a trailer full of junk ready to go to the dump!
So, what did I do?
I asked her if I could rummage through it!
I got a ton of cool things and a couple of those items was some
great chippy white wood columns.
I took them home,
and here is what I made with them!

I made 2, but sold one. Anyway, here
is the steps I used to create this floor lamp:
My column:

These lamp parts, all from Home Depot:

Check out this gorgeous chippy paint!

I also had a few misc. other parts, but I will get to that shortly.
I needed a piece for the top, so I cut a piece of 1x8 pine in a square,
then to find the center {where my lamp parts will go} I made an X with my pencil:

The piece it is sitting on is my base. I had this piece from something else,
but you could also use a square piece of wood.
Next, you want to drill a hole in the center, making sure it is the appropriate size for your lamp kit fittings:

Put your lamp kit parts together, following the instructions on the package.
Here is the top:
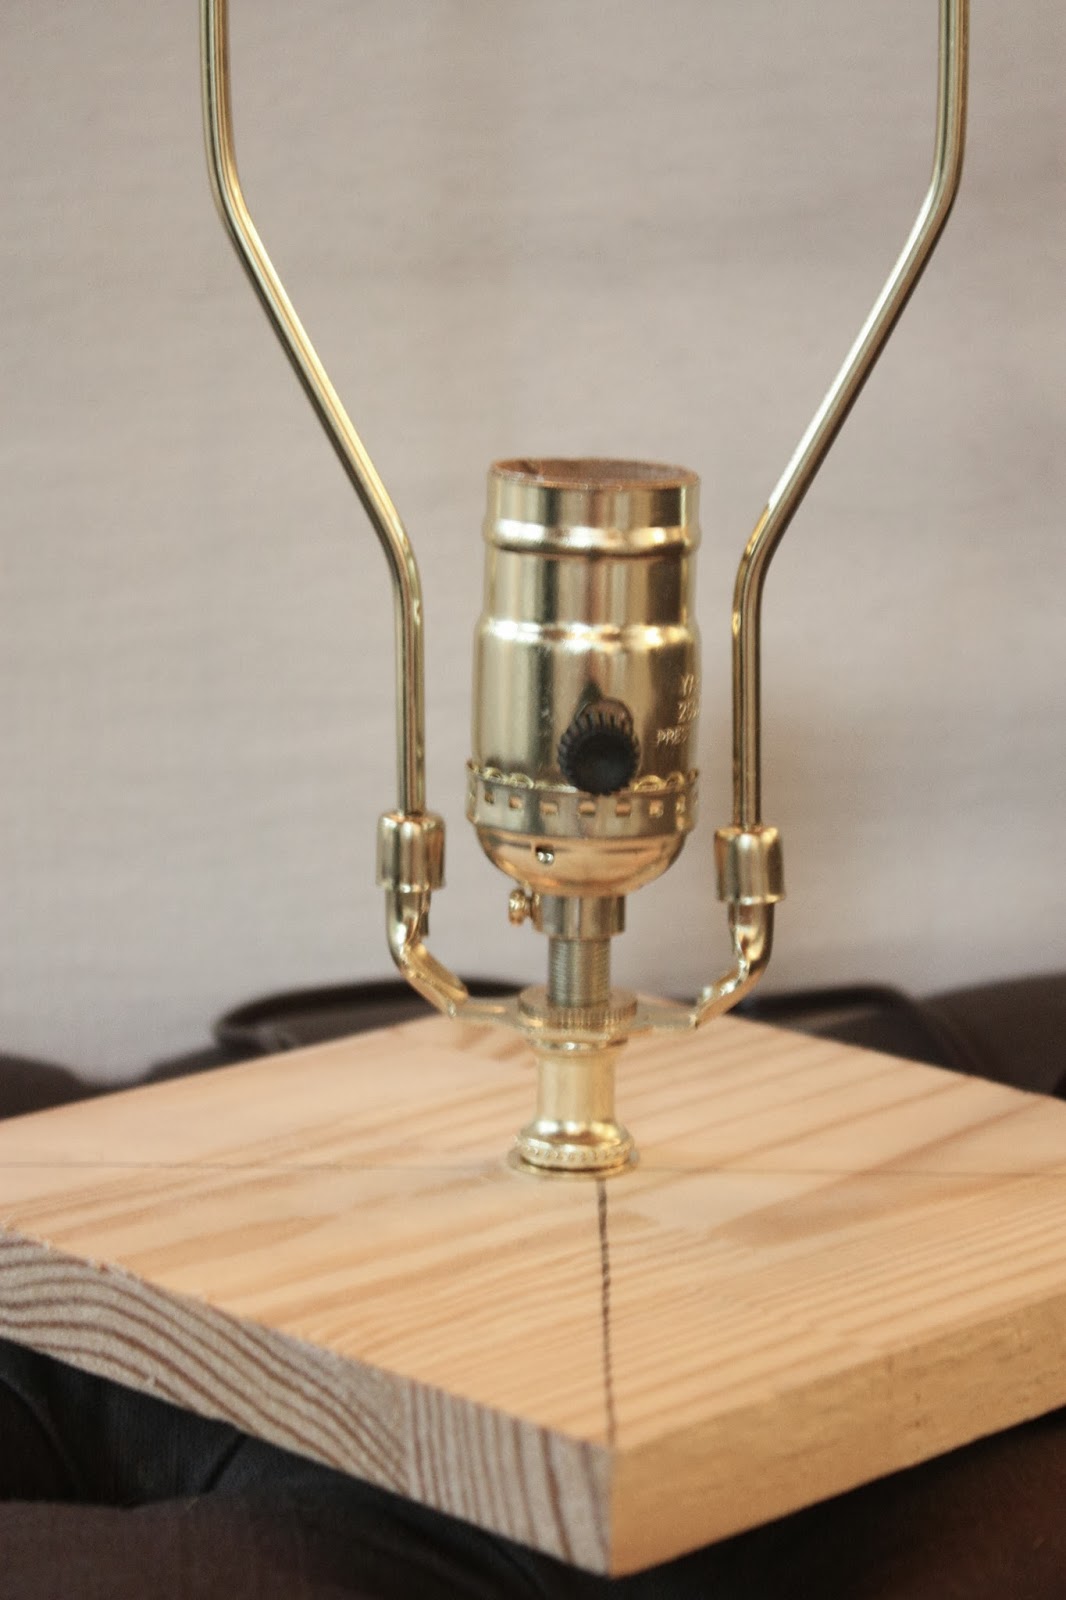
And the underside:

Next, I painted the whole thing to match the chippy column. First, I spray painted it all white:

After that was dry, I used a combination of different colored paints, glazes, and waxes to get the look I wanted:

While that paint was drying I notched out a spot at the base of the column for the cord to exit:

For this I used a jigsaw and a chisel to cut away the wood piece, which I had drawn on with pencil.
The next step is just to put it all together. Place your "top" on, the piece of wood you distressed with the lamp kit.
Make sure your cord is running down the center of your column and comes out the hole you notched out in the bottom.
If your cord isn't long enough you can add an extension cord at this point.
I attached the top piece with my nail gun.
Then place the whole column works on top of your base, again, make sure the cord is out before you attach it. Again, I used a nail gun.
Oh, one quick note-test out your lamp to make sure it works before you nail the whole piece together!
And here you have it!


This was my first time ever making lamps and I thought it was actually fairly easy!
I hope I have inspired you to create something out of junk!
xoxo
No comments:
Post a Comment