Showing posts with label things I've made. Show all posts

Tuesday, May 12, 2015

~how to get the Restoration Hardware look on a budget~

It was really great to hear your feedback on this home decorated like a Restoration Hardware catalog.


I think we all agreed that it was pretty but a little over the top.
It was missing personal touches and that lived in feeling.
And can you imagine how much money it would cost to decorate your house exclusively from Restoration Hardware?

After this post I thought that it would be fun to pick a room in my house and decorate it with the Restoration Hardware look, but not necessarily with everything from their store.
So, I did. I chose my dining room and the best part is that I did not spend a dime.
Here is how I did it.
The neutral walls help.
If you flip through a Restoration Hardware catalog you will notice that all the walls are neutral, whether they are light or dark, there are no bright colors on the walls.
The color of our dining room is Swiss Coffee by Behr.

All of our chairs are actually from Restoration Hardware. We are lucky enough to have an outlet near us which I frequent often.
However, you can find similar chairs here and here.


Botanicals are huge in creating this look.

You can read the story about mine here.
They are actual flower pressings from the early 1800's.
You can find similar free printables here.


Keep things neutral but add in tons of texture.
These beat up vintage leather suitcases do the trick and they can double as storage.


To add a bit of French flair I added this simple arrangement to the table.
The pot was outdoors and I simply brought it in and planted Spanish Lavender in it and placed Spanish moss around the top.
This is pretty much the only color in the room.
Everything from this centerpiece can be found at Home Depot.


To style the bookshelves I ripped covers off of vintage books and stacked them every which way.
I added a bit of greenery with boxwood planted in this urn.


I just finished this tortoise shell. 
If you missed the post, you can read about it here.
I framed a plant description that goes with the botanicals.
Tutorial for this system coming Thursday!


On the shelves I added a lot of concrete pieces.
The DIY for these spheres here.


This was super simple, I just rolled up sheet music and tied with twine and placed in a thrifted silver bowl.


One thing I didn't get a photo of was this knock off subway art which is still one of my favorite things.

I hope you can take away some inspiration from this post on decorating your home in this style without spending a small fortune.

xoxo


Wednesday, April 29, 2015

~tie dye napkins~

Here's a fun project to do with the kids even.
Cody and I {our 12 year old son}
made these napkins on a whim and I love how they turned out.


We used navy blue to go with the new chair slips.


There is very simple instructions on the back of the container.


We used some cream colored cloth napkins we had on hand for this.
We tied them up with rubber bands and string for a random look.
They washed and dried beautifully.


Is tie dye coming back or am I just reliving my childhood here?
Whichever it is, it was a fun project to do with Cody.
xoxo

Monday, April 27, 2015

~inspire me diy project~

Dear projects,
You are piling up.
Sometimes I love working with you, other days I just want to sleep and forget all about you.
But then I get on Pinterest, or an idea pops in my head, and the lists get longer.
A promise to myself~I will finish projects I have already started, AND, I will tackle projects that have been on my brain for a while now.
Thank you Kennesha for kicking my booty into gear on this project.

Presenting Inspire Me DIY where 10 of us design bloggers will show you a project we have been neglecting or just wanting to get around to, in hopes to inspire
 you to check things off your to do list as well!


My project was not necessarily a "must do" but more of a "I've been wanting to do it"
project.

I like to switch things out with seasons, shocking I know.
Just coming home from vacationing in Hawaii and seeing all the gorgeous blues of the water and skies,  and all greys and tans of the sand, made me want to bring a little of that into my own home.
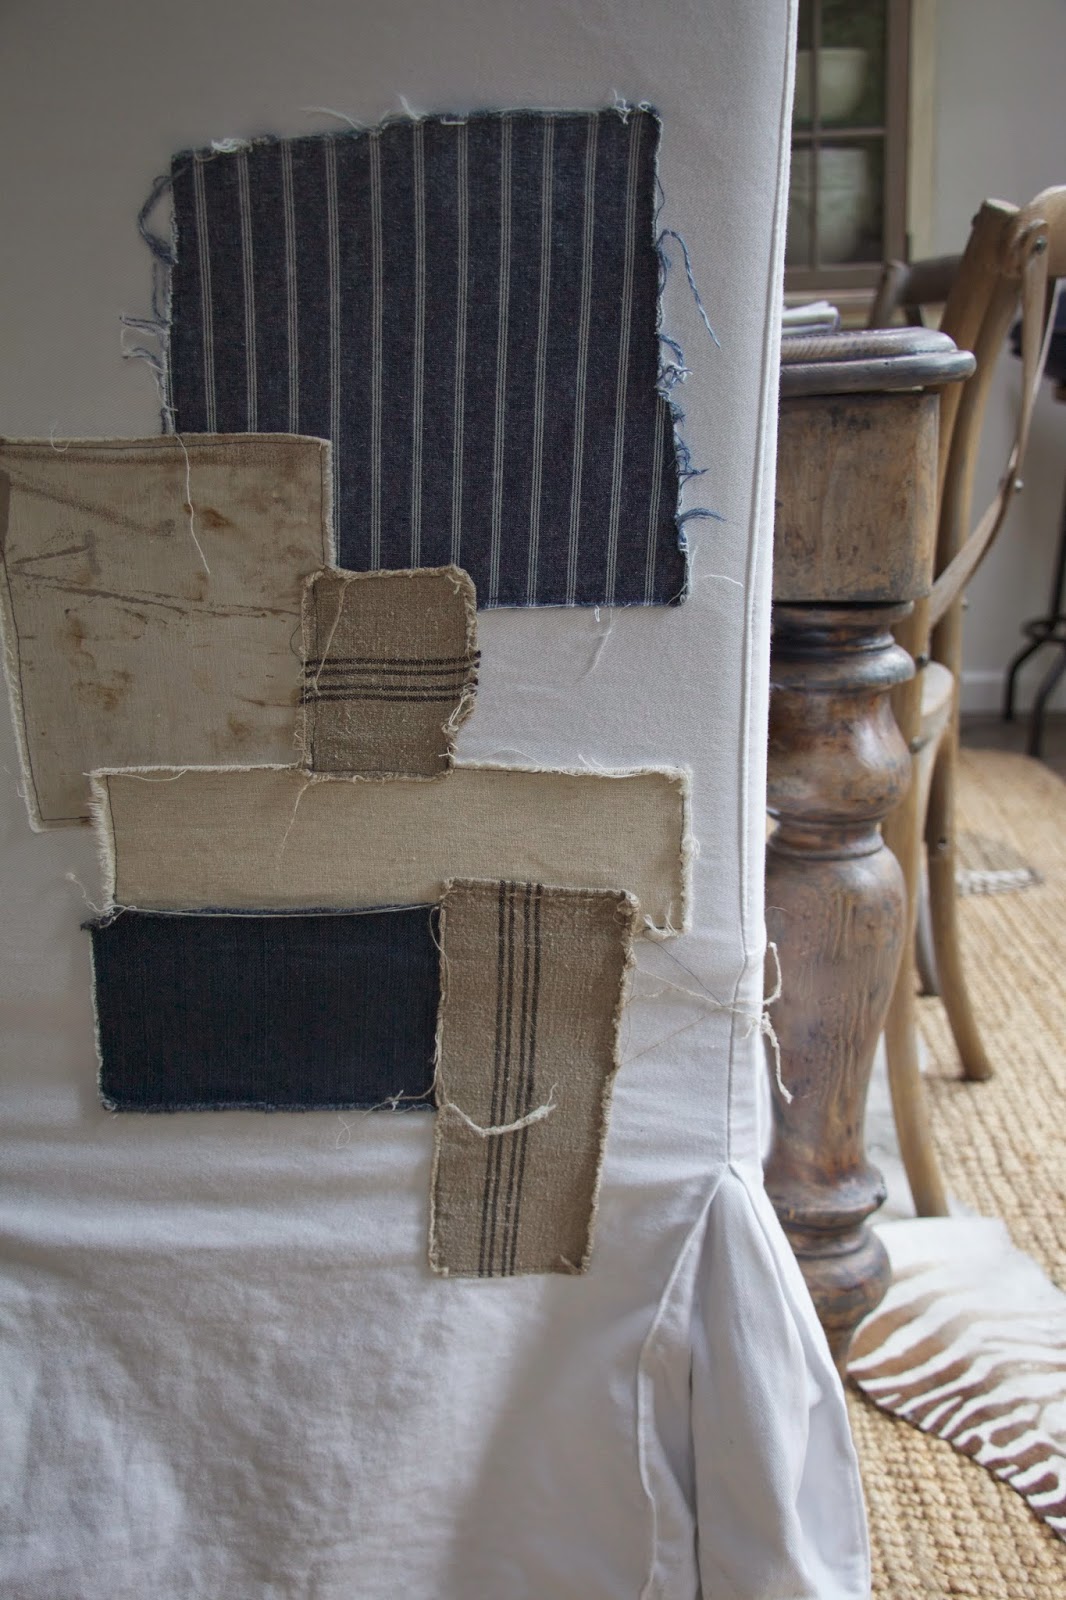
I had also been wanting to update my Ikea chair slips that I stenciled numbers on a while back.
So, I went out to my studio and pulled out all the blue and indigo colored fabric I had as well as any old tan grain sack material I had.


Then I went over to my moms to borrow her sewing machine because mine is on the fritz. I explained what I was doing and she pulled out this pair of pants from her sewing pile.
She bought them at a thrift shop for the fabric.
I swear, my mom is way hipper than this!
Not to be confused with hippier…..


The fabric was perfect! I began to cut up random sections of my fabrics and then sew them on.


No real rhyme or reason, but I did want the edges to be frayed so I left them raw.


I love the mix of the old and new fabrics.


The project took longer than I expected, but  I love how they turned out and I love that this project is now checked off the list!


Can you find the ugly pants in the picture below?
Much better on the chair right?


 This tan material was left over from another project.
It's vintage grain sack and I love the the old original stitching.
The polka dot piece below it is from another pair of jeans.


Are you running to your closet to survey all your jeans right now?
To see what the other bloggers are up too go 
here to view House Seven

here for Restoration House

here for This That And Life

here for Ms Craftburry bush

here for Thoughts From Alice

here for Simple Stylings

here for Through The Front Door

here for Migonis Home

and 

here for City Farmhouse


I hope we have inspired you!
xoxo

Thursday, April 16, 2015

~thrifty thursday~{designer layered picture frames}

Don't ya love a good knock off?
I have been in love with John Robshaw fabrics for a while now.
Gorgeous, but expensive.
So, my goal was to get a little John into my home without going broke.
That is when I started googling his fabric images.


To make these frames simply copy and paste any of the fabric images onto a word document making them 8x8.
Print them out onto card stock, it is easier to work with.
Then follow this tutorial on how to get it onto the $1 Michaels picture frames below.


Next up I used this 12x12 wood piece that I got at my local craft store on sale for $5.99,
 originally $9.99.


You can paint them any color to coordinate with your "fabric"
I chose Hale Navy by Benjamin Moore.
Let dry then lightly sand the edges for a worn look.


Then the next step was easy.
Using velcro 
{so it's easy to swap the photos out}
I simply attached the picture frame to the wood piece.


xoxo


Thursday, April 9, 2015

~thrifty Thursday~{diy basketball hoop}

Did you catch this episode of Magnolia Farms?

There was this DIY basketball hoop that I fell in love with.

So I found some free pallets on the side of the road, loaded them up and brought them home.
They were a paint to get all the wood off in tact, but I managed to salvage enough wood from 2 pallets.

With that wood I made this frame:


Then I "filled in" the frame with the pallet boards cut to length.


Next came the task of finding an old hoop.
I went to about 100 different thrift shops looking, and nothing.
I searched craigslist and ebay but they were really expensive.
So, while talking out loud to myself one day about it, 
my son says, 
"oh, I just found one of those in the woods!"
 He then hauls in this basketball hoop.
Voila, sometimes things just fall into place.
I had found the net at a thrift shop while I was out looking for the hoop.
Perfect.

Naturally, I hung it in his room so he can play hoops from bed.
His reward for all his help :)


I just love it when projects turn out as planned!
xoxo

Thursday, March 26, 2015

~thrifty Thursday~{French crate}

Here is how I made this tray for $3.00, and you can too!

I started with this piece of expanded steel. You can buy this at home improvement stores.
I happen to have this in my studio, so I didn't have to buy mine.
Think outside the box here. You don't necessarily need a piece of expanded steel for this project.
Look around for unusual pieces in the right size.
Perhaps plexi glass, grates, old windows, etc.


My piece of expanded metal measured 32" x 19"


You are going to need to pick up 3 1x2's at the hardware store.
These are I believe 8' long and are only 97 cents each.
I purposely picked out the roughest ones I could find because I wanted my crate to look old.
So grab ones that are cracked, rough, and a little beat up.

For my crate 
{you will need to adjust to the size of your insert, meaning metal piece, etc.}
I cut 6 bottom pieces slightly larger than the 19" width.
I cut them at 20 1/2"

Then I cut 4 end pieces at 18 3/4" and 4 side pieces at 34" and finally, 4 short pieces to brace everything together in the corners. These are 5"

Again, you will need to adjust to your own measurements, this will just be a guideline for you.


Next you will need to darken up those pieces of unfinished wood.
You can use a stain, or if you are impatient like me and want a quick dry product, wipe on a little dark wax. I bet you could even use shoe polish. Does anyone still have any of that?


Now it is time to assemble.
I first laid my 6 pieces flat on the ground. This is what your metal will lie on top of.


Place the metal on top and make sure the bottom pieces are straight.
Add the end pieces and the side pieces. I used a air nailer to attach them all together.
If you don't have an air nailer, wood glue and small nails would work.
Note that the sides and end pieces of wood should be sitting on the taller side, not laying down like the bottom pieces.
{sorry, I am horrible at tutorials!}


Here is  a close up of what it should look like at this point.


Next, take the 4 shortest pieces and place them in each corner securing with your nails.


Attach the 2 remaining sides and the 2 remaining ends flush with the top of the shortest pieces.
Notice how one of my pieces of wood is totally broken off and because my measurements were slightly off, the pieces of wood don't meet up?
Yep, I like to call that character :)


Here it is all done!


Oh, and I don't know if you can see it real well, but I used a French stencil to add some wording to the centers of each side, just to really give it that old crate feel.


So, are you going to make one, or have I totally lost you with these directions?

xoxo