Showing posts with label chippy. Show all posts

Friday, July 25, 2014

~thrifty thursday~{on friday}

If you follow me on instagram you know that we had a small fire in our kitchen on Wednesday, which is why this post is coming a day late.

Thank goodness we were home and I was able to put the fire out fairly quickly with a fire extinguisher.
We had an electrician out yesterday and they said our new Bosch dishwasher was faulty, which is what started the fire. Our house still smells like smoke, but we are all ok and that is what matters.

Thank you for all your concerns and comments. 
My friend stopped by last night with these gorgeous flowers. They somehow brighten up our stinky damaged kitchen.


Because I have been so busy with this kitchen mess, I didn't go through and edit all the "how to" photos for this thrifty Thursday project.

Basically I went through my studio and found anything I could, wood, metal, etc. that resembled a letter, painted them white and aged them, and used liquid nails to attach them to a painted board or cupboard door.


I cut down dated but ornate picture frames, used floral appliqués, and door knobs, as well as other misc. goodies.


It was fun coming up with new uses for these objects that I've been collecting over the years.


If I couldn't find materials to make up a letter, I painted wooden letters that I already had.


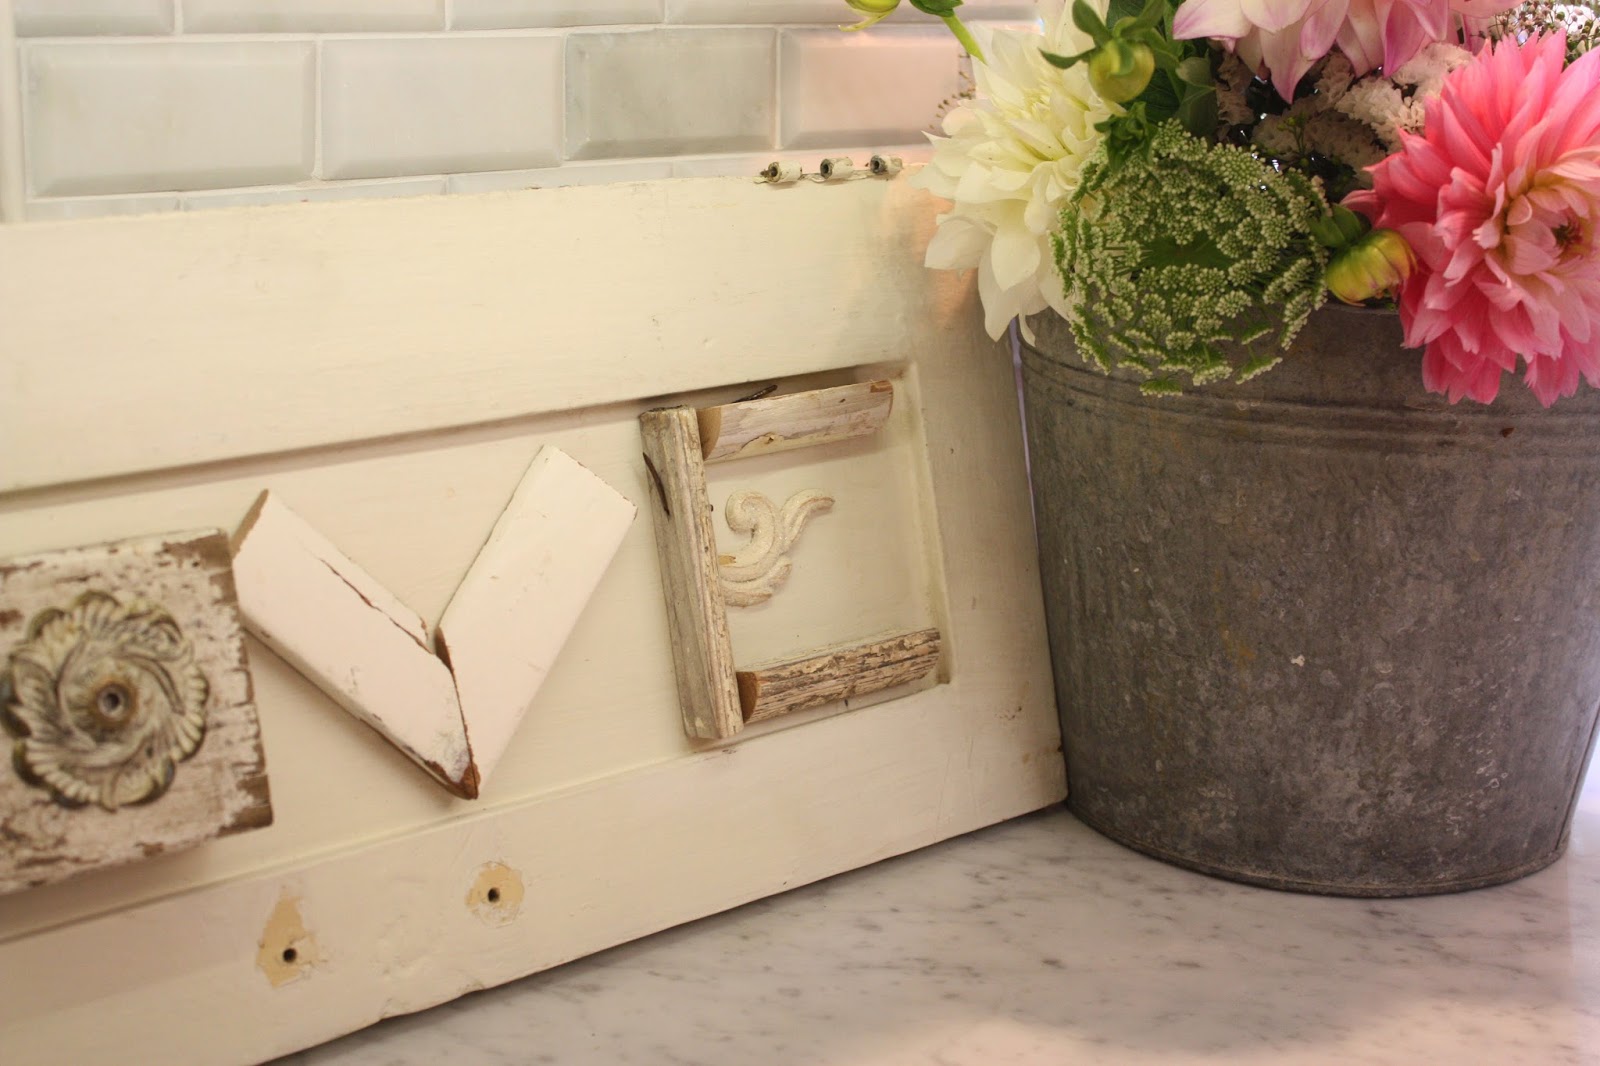


I will be selling these, along with a ton of more, at the Haley's Cottage French Flea Market on August 2nd, in Kirkland Washington.
I hope to see all you locals there!


xoxo

Monday, July 7, 2014

~reclaimed wood planter boxes~

It's that time of year to spruce up the gardens and deck areas, which is what inspired today's project.
Warning picture overload coming….

I am so in love with these new planter boxes I made that I think I might cry.
Happy tears of course.


Would you like to make your own?
Great!
Let me show you how.

Start with a basic wood planter box.
You can buy them new or you might happen to have a couple laying around like I did.


Lay it on it's side and mark the center.
Draw a straight line down the center of it.


Now comes the fun part. 
You will need a ton of scrap wood.
I didn't worry about the thickness of each piece, I just sorta went for it,
 using up all my scraps in my studio.

Cut 2 corner triangle pieces, and lay those down.
{#1}
Whatever you do on the right side, you will do on the left side.

Next you are going to cut
{and every time I say cut, it's on a 45 degree angle}
the pieces that say #2. You want these pieces to touch the top and join together at the center line you drew. 
{look for my purple line I drew on mine} 

Notice how mine hangs over on the bottom right?
Using a pencil make a mark on the underside flush with the edge of your planter box. This is where you will cut.

Now using a nail gun {or by hand}
nail on your 2 #1 corner pieces followed by the 2 #2 pieces.


Once those are in place measure the spot between #1 and #2 and add those pieces.


Then you are just going to work your way down all the way to the bottom.


Repeat on the other 3 sides. 


Once all 4 sides are complete you will need to add your trim pieces.
For the trim I went down to a salvage yard and bought enough matching white trim to cover both planter boxes. 

"Frame" out each side, cutting on 45 degree angles again, and nail in place.


For the tops I used more salvaged wood, cut again on 45 degree angles, nailed into place.


Plant them and you are done!
Stand back and enjoy your handiwork.


The sky is the limit with the scrap wood.
As you can see, I used old signs torn apart on one of mine.


The one below even 
has a piece of rusty metal on it.
Can you spot it?


Let me know if you make some, I'd love to see!

xoxo