Thursday, July 31, 2014

~thrifty thursday~{a fairy garden chair}

What happens when one of your beloved Restoration Hardware
 dining chairs seat caning
blows out? 

You cry a little, then you get over it and turn it into garden art.
A fairy garden to be exact.


Start with any chair that has no seat.
At your home improvement center pick up a basket liner that looks like this and that will fit the opening of your chair.


Using a staple gun, staple it in place.


Add potting soil and plant with your favorite flowers.
I used lavender and a ton of succulents.
I think the succulents are perfect for this project.
At this point you can leave it as is, or to turn it into a fairy garden, continue on…..


I wanted to hang a little sign from the chair, so I painted these words on a piece of chippy old wood I had. Hang it from twine for a rustic garden feel.


Now you can start to add in little fairy furniture if you wish.
I added a little wire chair and table, and miniature log fence pieces.
I added a fairy as well but I thought it cheapened the look, so I took her out.


 Tuck the furniture in here and there for a "secret garden" look.
I found all my furniture at a craft store.
I am sure you could look in the kids section at thrift stores and find some great things, or perhaps you have some old dollhouse furniture?


 Make sure you have plants that trail down over the sides, this looks best 
and gives it the look that it's not newly planted.


And that is it!
This will be available for sale at the French Flea Market this Saturday.
Hope to see you there!
xoxo

Wednesday, July 30, 2014

~gluten free granola~{home made}

Lately I've been enjoying gluten free granola for breakfast.
But yesterday I went to the cupboard and realized I was all out.
I had gluten free oats in the pantry, so I decided to make my own.
You can add or omit anything to this recipe, these are just the things I had on hand, and I think it turned out really good!


I hope you enjoy it as much as I do!
xoxo

Tuesday, July 29, 2014

~boots aren't just for winter~{a fashion post}

A fashion post?
Yep, I am stepping outside of my comfort zone today
 and talking about something besides paint and pillows.

I am talking boots.
Why?
Because I love them. I love them so much I could wear them everyday, and I am here to tell you, you can too!

Boots don't need to be saved for winter.
Get out your daisy dukes and have some fun!


I buy most of my boots from Country Outfitter.
They have a huge selection and flash sales, and you know me, I like a good discount!
I bought mine on sale and it looks like they are sold out, but here are some similar ones.

Tomorrow I will be back to my regularly scheduled design posts. 
Don't worry, I don't see myself in any fashion magazines anytime in the near future. ever.

All photos by the talented Christine at Trimood Photography.

xoxo


Friday, July 25, 2014

~thrifty thursday~{on friday}

If you follow me on instagram you know that we had a small fire in our kitchen on Wednesday, which is why this post is coming a day late.

Thank goodness we were home and I was able to put the fire out fairly quickly with a fire extinguisher.
We had an electrician out yesterday and they said our new Bosch dishwasher was faulty, which is what started the fire. Our house still smells like smoke, but we are all ok and that is what matters.

Thank you for all your concerns and comments. 
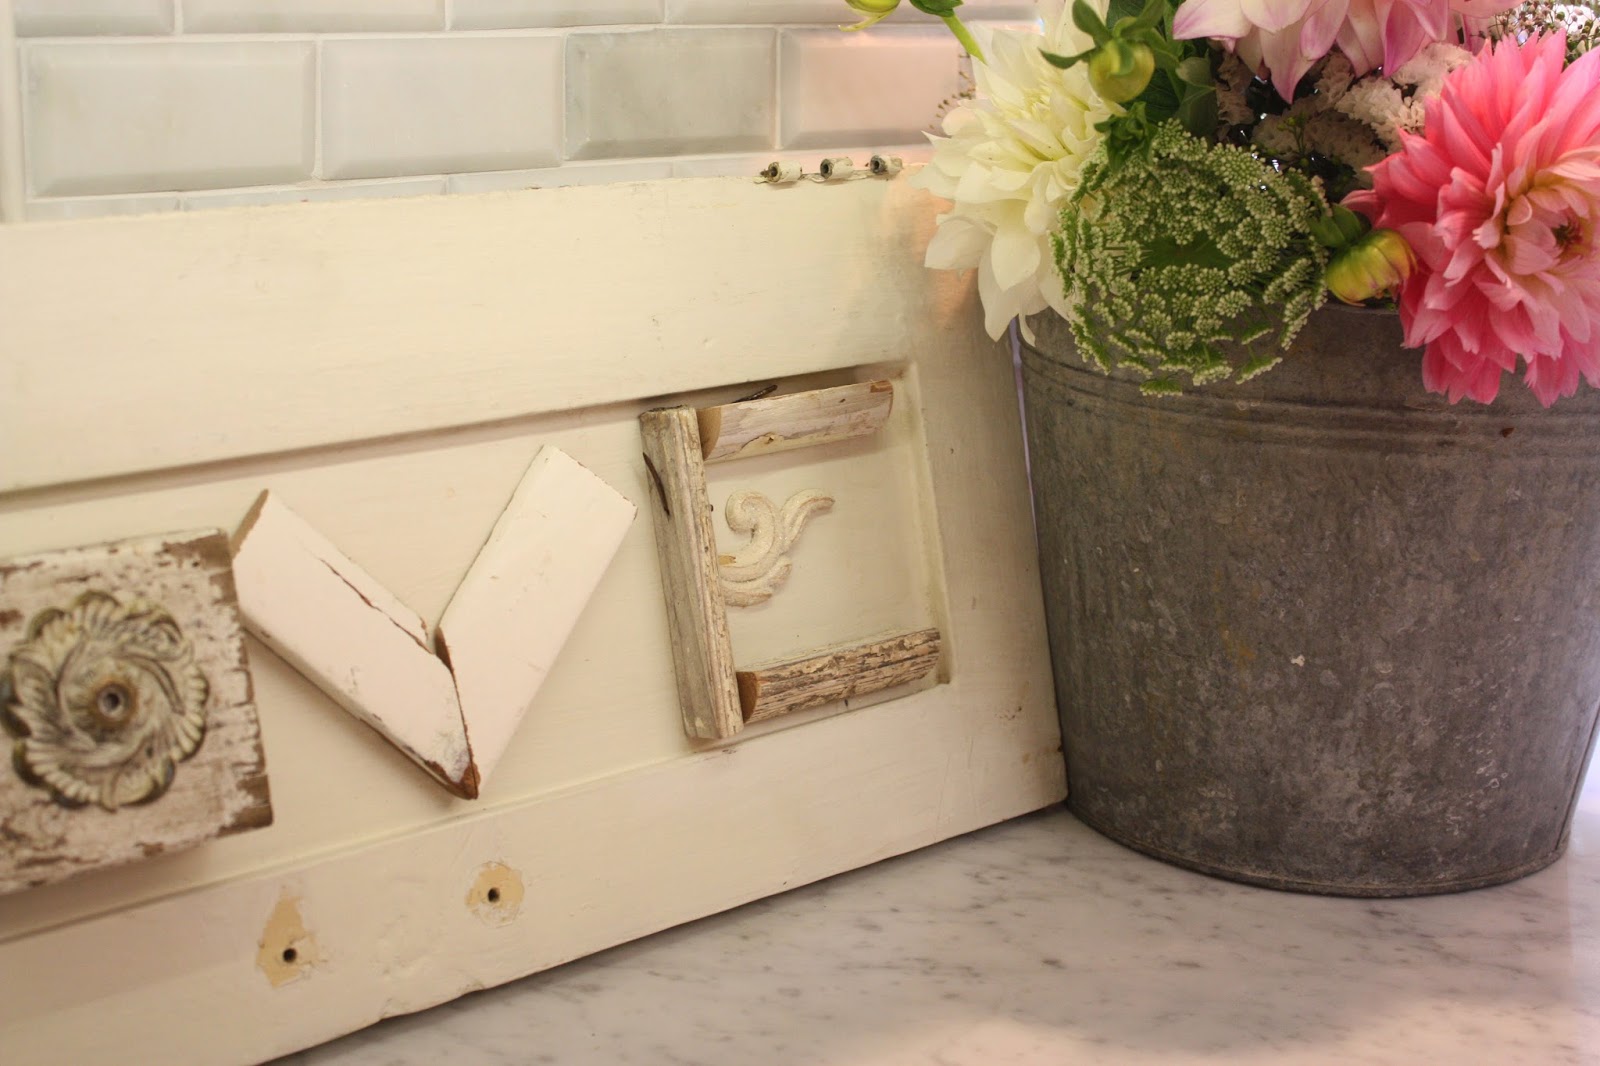
My friend stopped by last night with these gorgeous flowers. They somehow brighten up our stinky damaged kitchen.


Because I have been so busy with this kitchen mess, I didn't go through and edit all the "how to" photos for this thrifty Thursday project.

Basically I went through my studio and found anything I could, wood, metal, etc. that resembled a letter, painted them white and aged them, and used liquid nails to attach them to a painted board or cupboard door.


I cut down dated but ornate picture frames, used floral appliqués, and door knobs, as well as other misc. goodies.


It was fun coming up with new uses for these objects that I've been collecting over the years.


If I couldn't find materials to make up a letter, I painted wooden letters that I already had.


I will be selling these, along with a ton of more, at the Haley's Cottage French Flea Market on August 2nd, in Kirkland Washington.
I hope to see all you locals there!


xoxo

Wednesday, July 23, 2014

~diy letter & number blocks~

Today I want to show you how you can make these fun wood letters in just a few simple steps.


You will need a 1x6 pine board cut into squares.
If you don't have a chop saw, the home improvement store will cut them for you.


I made a large quantity, so I covered my kitchen island to protect the surface and laid them all out.


Next you will need letters, numbers, symbols, etc. to stick on top.
These are from the office supply store.
I have used these in numerous projects.
Make sure they are stuck on really well, and centered. 

{you will need to dust off the surfaces before applying to ensure they stick on well}


Next, using your paint color of choice, paint right over the tops and let dry thoroughly. 
When the tops are dry, flip over and paint the sides and backs.
Once thick coat is plenty on all.


When everything is dry you can peel off the sticker to reveal the raw wood underneath.


Using a palm sander, sand the tops and sides.
You can do this by hand if you don't own a palm sander.

The photo below shows the raw version on the left and the sanded version on the right.
After you sand them all, dust them off again.

Then using a rag, go over the tops and sides 
with Annie Sloan dark wax and let dry.


And that is it!
You can spell out different names, sayings, etc.


To see another project I did with 1x6 pine squares, click here.

xoxo